DIY Doesn’t Mean Do It Alone, Part 2: Install Your Home Solar System
- Nov 6, 2025
- 5 min read

If you missed the first part of this series, start with [DIY Doesn’t Mean Do It Alone, Part 1: Getting Started with DIY Solar].
With your design, permits, and equipment in hand, it’s time to finally install your DIY home solar system. We help you install, activate, monitor, and maintain your system for years to come.
Step 1: Prepare for Installation
When working with powerful electric systems, you can never prepare too much. This stage is about ensuring your site, tools, and schedule are in place so the installation goes smoothly. We guide you through this step to help you plan and avoid common pitfalls before installation begins.
First, consider whether you have the experience to install the racking and panels yourself, or want to hire a professional electrician. While the former option costs less and is doable for those experienced with high-voltage electric projects, the latter option is much safer, more convenient, and more reliable. If you don’t have experience working with large electrical projects, definitely hire a professional.
If you’re coordinating with a licensed electrician or local installer, this is the time to get them involved. We can provide them with your plan set and component details so everyone’s on the same page.
If you are qualified and decide to handle the installation yourself, ensure you have all recommended tools and safety equipment:
Fall protection harness
Sturdy ladder with stabilizer arms
Solar panel suction cups
Labeling materials for disconnects, breakers, and meters
Impact driver and drill
Work belt, hack-saw, chalk, extra-long measuring tape
Knee pads, caulking gun, flat pry bar
Waterproof cable glands matching your AC trunk cable
Before you start installing:
Review your Bill of Materials and confirm every component has arrived.
Inspect your home for the best cable route from attic to basement. Interior runs are preferable for aesthetics and cost, while exterior runs may require conduct or specialized cables.
Inspect your roof or ground-mount area to ensure it’s clear, level, and ready for racking.
Set aside enough time for each stage of work, keeping in mind that weather and inspection schedules may affect your timeline.
Our technical support team is available to review your plans and answer questions at any stage. Many customers schedule a quick call to double-check mounting placement, wire routing, or inverter setup before moving forward. This helps catch small issues early and saves time later.
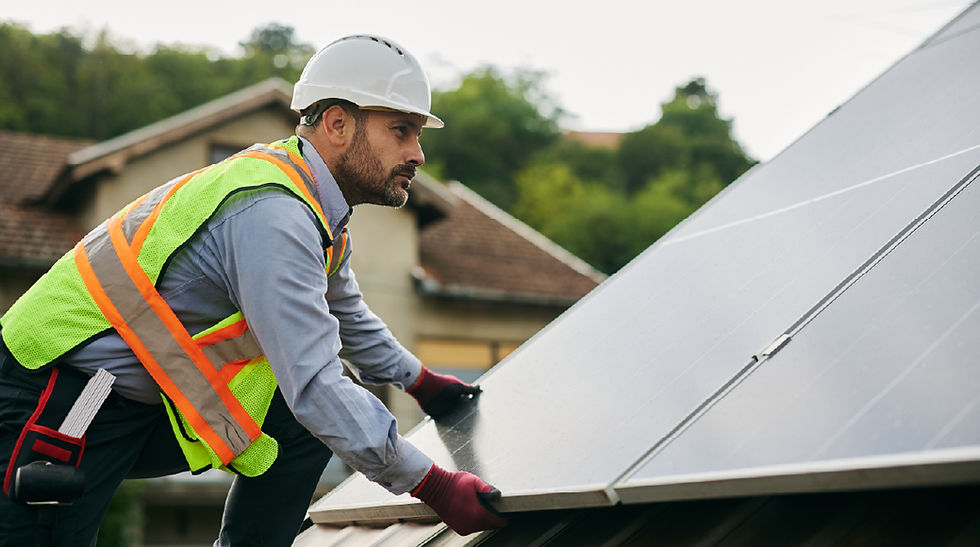
Step 2: Installation with Expert Backup

Seeing your solar system take shape is the most rewarding part of the process.
Installation usually happens in a few main stages:
Setting the mounts and rails on the roof or ground structure
Installing micro-inverters or power optimizers
Mounting the solar panels and connecting the wiring
Running conduit and connecting the junction box to your main electrical panel
A few tips to keep in mind:
Double-check torque settings on mounts and hardware.
Keep wire runs tidy and labeled for easier inspection later.
Take photos of your progress, especially before panels go up.
If you have a licensed electrician assisting, they can handle the wiring connections at your main service panel and confirm your system meets local electrical code. We can share all technical documentation with them directly to make coordination easier. And of course, Solerus’ technical support team is always available for real-time assistance.
Installation Steps
Check attic and roof truss spacing.
Use fall protection and take safety precautions while working on the roof.
Measure and mark the array placement, install roof mounts and rails.
Arrange and connect micro-inverters.
Select and install the rooftop junction box.
Have the electrician review all work before panel installation, providing thorough photo documentation as needed.
Properly label all electrical components as required by your utility.
Safely install solar panels, using assistance when possible.

Step 3: System Commissioning
Once installation is complete, your solar system must be commissioned to ensure everything operates correctly and safely. This process includes programming grid connectivity and setting up any battery configurations through either the inverter’s LCD screen or (more commonly) a commissioning app.
Before installation, download the app recommended for your inverter and create your account. Doing this ahead of time helps the setup go smoothly once your system is ready to power on.
For grid-tied systems, submit your final permit documentation to your utility after installation is complete. The utility will review your application and issue permission to operate (PTO). In many cases, they will also install a bi-directional meter before the system is activated and allowed to export power.
The Solerus Energy team is happy to walk you through the commissioning process step-by-step; just schedule a time in advance so a team member is available to assist.

Step 4: Inspection and Permission to Operate (PTO)
Solar systems require your local utility’s inspection and permission to operate before being connected to the grid. This stage ensures that everything is safe and code-compliant. Our team helps you prepare for inspection so you can pass the first time and move quickly toward activation.
Before scheduling your inspection:
Review your installation against the plan set to make sure every component is in place.
Label electrical components clearly. Most inspectors require specific labels on disconnects, breakers, and conduits.
Take a few photos of key wiring and mounting points before closing things up; they’re useful for quick verification.
Confirm that your grounding, conduit runs, and panel spacing match the approved drawings.
Once your system passes inspection, your utility will issue Permission to Operate (PTO). This step usually involves reviewing your paperwork and installation photos before the utility installs or reconfigures your net meter. With our guidance through permitting, inspection, and utility approval, most customers find this stage to be straightforward.
Step 5: Enjoy Free, Clean, Independent Energy

Once your system is up and running, you’ve officially joined the growing community of homeowners producing their own power. Most solar systems have a 25+ year lifetime, and are low-maintenance beyond occasionally cleaning the panels and sweeping debris off them as needed.
That being said, we encourage customers to stay engaged with their systems by
Checking production regularly through their monitoring app or dashboard
Keeping an eye on seasonal performance trends and utility savings
Noting significant changes in household energy use, like adding an EV or expanding your home
Reaching out for advice before making changes, like adding battery storage or expanding capacity
For your system’s lifespan, we’ll be there to help troubleshoot and adapt your system so it stays at peak performance and continues to serve your home’s changing needs. Our expert technical support team is always available to assist you, providing real-world advice and guidance without scripts or hidden fees. Your journey to sustainable energy is supported for a lifetime.
Ready to Get Started?
If you’re ready to start your solar project, we’re here to make it simple. From design to activation and troubleshooting, our team helps you every step of the way so you can take control of your energy future with confidence.
Contact our team to begin your journey towards energy independence.